Introduction
Turning your house into a smart home no longer demands a hefty investment or professional installation. With the rise of affordable smart gadgets, intuitive apps, and simple plug-and-play setups, transforming your living space into a tech-savvy haven is easier and more budget-friendly than ever. Whether you’re renting a compact apartment or own a spacious multi-story home, modernizing with smart technology is within reach.
Today’s smart devices are designed for ease of use, allowing anyone to automate daily routines, enhance security, and boost energy efficiency with minimal effort. You don’t need to be a tech expert to control lighting with a voice command, receive real-time security alerts, or program appliances to fit your lifestyle. The beauty lies in starting small and expanding gradually.
This guide will walk you through a practical, step-by-step approach to building a smart home on a budget. We’ll explore affordable, high-impact devices, smart ecosystems that simplify control, and clever automation tips that elevate convenience without overwhelming you. You’ll discover product recommendations that provide the best value, learn how to prioritize your purchases, and pick up expert strategies for getting the most out of every dollar spent.
By the end, you’ll see how achievable it is to create a modern, connected home that caters to your needs while staying well within your financial comfort zone. The future of smart living isn’t just for luxury homes—it’s for anyone willing to plan smart and shop smarter.

Step 1: Plan Your Smart Home Goals
The foundation of a successful smart home lies in clearly defining your goals before making any purchases. It’s easy to get distracted by flashy gadgets, but starting with a clear vision ensures every device you buy serves a purpose. Begin by identifying which aspects of your home life you want to improve. Do you want to cut down on energy consumption? Enhance security? Simplify daily routines with automation? Or perhaps you’re aiming to elevate your entertainment experience?
Once you’ve outlined your main objectives, break them down room by room. This approach helps you stay organized and prevents you from feeling overwhelmed. For example, you might start with automating the lighting in your living room or setting up a smart plug for your coffee maker in the kitchen. Focusing on one area at a time allows you to build confidence and see immediate results.
Additionally, consider your household’s unique needs. Families with kids may prioritize smart locks and security cameras, while someone working from home might focus on smart lighting and voice-controlled assistants. Jot down a simple wishlist that aligns with your lifestyle and set a realistic budget for your first round of purchases.
Pro Tip: Don’t rush into buying multiple devices all at once. Start small, learn how to use each gadget effectively, and gradually expand your setup as you become more comfortable with the technology. A well-thought-out plan is your best ally in building a cost-effective and functional smart home.
Before buying anything, decide what you want your smart home to do. Examples:
- Save energy
- Automate lighting
- Improve home security
- Add entertainment controls
Write down the rooms or features you want to upgrade first. Prioritizing helps you avoid overspending on unnecessary gadgets.
Pro Tip: Focus on one room or one system (like lighting) at a time so you don’t get overwhelmed.

Step 2: Choose an Ecosystem
Selecting the right smart home ecosystem is crucial for ensuring your devices work seamlessly together. An ecosystem is the platform or hub that connects all your smart gadgets, allowing them to communicate and be controlled from a single app or through voice commands. The most popular ecosystems are Amazon Alexa, Google Home, and Apple HomeKit. Each has its strengths, and choosing one early on will simplify your smart home journey.
Amazon Alexa is often the go-to choice for budget-conscious users because of its extensive device compatibility and frequent sales on Echo devices. If you’re an Android user or deeply integrated into Google services, Google Home provides excellent functionality, especially for voice controls and integrations with Google Assistant. Apple HomeKit, while offering robust security and privacy, tends to be pricier but is ideal for households fully immersed in the Apple ecosystem.
Mixing devices across different ecosystems is possible, but it often leads to frustration with app-switching and limited automation options. Sticking to one ecosystem streamlines the setup process, enhances compatibility, and ensures a more user-friendly experience. Think of it as building a team where everyone speaks the same language.
Before making a decision, consider which virtual assistant you prefer, the devices you already own, and your budget. Choosing an ecosystem isn’t just about immediate convenience—it impacts how smoothly your smart home will function as you expand.
Pro Tip: Look for devices labeled “Works with Alexa,” “Works with Google Assistant,” or “HomeKit Compatible” to ensure they’ll fit effortlessly into your chosen ecosystem.
Smart devices usually work best within a single ecosystem (Amazon Alexa, Google Home, or Apple HomeKit). Mixing brands can work, but it’s easier to control everything if you choose one ecosystem from the start.
- Amazon Alexa – budget-friendly, huge compatibility
- Google Home – great for Android users
- Apple HomeKit – best for iPhone users but can cost more
Stick with one platform to keep things simple and cheaper in the long run.

Step 3: Start With the Basics
When building a smart home on a budget, it’s tempting to dream about high-end gadgets and advanced automation, but the smartest approach is to start with the essentials. Begin by investing in affordable devices that deliver the highest impact on convenience and daily living. Smart plugs, bulbs, and speakers are perfect starting points because they’re easy to use, inexpensive, and immediately enhance your home’s functionality.
Smart plugs can instantly transform traditional appliances into smart devices. Whether it’s automating a lamp, coffee maker, or fan, these plugs give you app-based or voice control without needing to buy expensive new appliances. Similarly, smart bulbs offer flexible lighting options, allowing you to adjust brightness, color, and schedules with a tap on your phone or a simple voice command.
Adding a smart speaker like an Echo Dot or Nest Mini not only gives you hands-free control over other devices but also serves as your smart home hub. These compact, budget-friendly speakers often come with promotional discounts, making them a cost-effective way to centralize control. You can play music, set timers, get weather updates, and even control other smart gadgets through simple voice prompts.
Another game-changing yet affordable addition is a smart power strip. Instead of buying multiple individual plugs, a single smart strip can manage several devices, all controllable through one app. This is especially useful for entertainment centers or home office setups where multiple gadgets need automation.
Pro Tip: Focus on devices that simplify daily routines first. Once you see how much easier life becomes with basic automations, you’ll be able to expand your smart home confidently and strategically, without straining your budget.
Instead of jumping straight to expensive cameras or smart appliances, begin with simple devices that have the most impact:
Smart Plugs
Transform old appliances into smart ones instantly. They’re affordable and usually under $20 each.
Smart Bulbs
Change color, dim lights, and automate schedules with bulbs starting around $10.
Smart Speakers
Entry-level smart speakers like Echo Dot or Nest Mini often go on sale for $30 or less, giving you voice control and a hub for other devices.
Smart Power Strips
Instead of buying 5–6 plugs, use one smart power strip to control multiple devices from a single app.
These basics will give you a solid foundation to build on without spending much.

Step 4: Automate on a Budget
Automation is the heart of a smart home, but you don’t need an expensive control panel to get started. With free apps like Google Home and Amazon Alexa, you can create routines that automate everyday tasks, making life more convenient without any added cost. For example, schedule your living room lights to turn on at sunset or set your coffee maker to start brewing the moment your morning alarm goes off.
Simple automation routines, like turning off all devices when you leave home, can be set up in minutes using your smartphone. These small tweaks not only save energy but also bring a luxurious, hands-free experience into your daily life.
If you want to take automation up a notch, consider investing in budget-friendly motion sensors. These devices, often priced under $20, can trigger actions like turning on hallway lights when someone walks by or activating a fan when room temperature rises. They add a touch of sophistication without requiring a hefty investment.
Another cost-effective strategy is to group devices in your app for coordinated actions. For instance, create a “Movie Time” scene that dims lights, turns on your TV, and adjusts the smart plug powering your sound system—all with a single command.
Pro Tip: Use automation to solve real-life inconveniences first, like eliminating the need to fumble for switches in the dark. As you get comfortable, you can experiment with more creative routines that suit your lifestyle. The goal is to gradually build a seamless living experience where your home intuitively responds to your needs, all without breaking the bank.
Automation is the magic of smart homes, but you don’t need fancy systems to get started. Use free apps like Google Home or Alexa routines to set up:
- Automatic lights at sunset
- Coffee maker turning on in the morning
- Fans starting when temperature rises
Bonus Tip: Look for motion sensors under $20 to automate hall lights or closets, they’re cheap but add a premium feel.

Step 5: Affordable Home Security
Securing your home doesn’t have to come with a hefty price tag. Thanks to advancements in smart technology, you can build a reliable home security system on a budget. Start with entry-level smart cameras like Wyze Cam or Blink Mini, which offer features such as 1080p video, night vision, and motion alerts for under $30. These cameras are easy to install and give you peace of mind with real-time notifications sent straight to your phone.
For front door security, consider a wired video doorbell like the Ring Video Doorbell Wired. It’s an affordable way to see who’s at your door, speak to visitors, and receive motion alerts, all through an app. Often priced under $60, it’s a cost-effective way to monitor entry points without needing a full-fledged security system.
Smart locks are another practical addition that can be found at reasonable prices, especially if you look for sales or refurbished models. Brands like August and Yale frequently offer smart locks under $100, allowing you to lock or unlock your door remotely and provide keyless access to family or guests.
Pro Tip: Don’t overlook window and door sensors, which can be purchased in budget-friendly multi-packs. These simple sensors alert you if a door or window is opened unexpectedly, adding an extra layer of protection.
Look for bundled deals or certified refurbished devices to maximize savings. Even with a modest investment, you can build a robust, scalable security setup that protects your home and loved ones, offering safety and control without a costly subscription or professional installation.
Peace of mind doesn’t have to cost a fortune. Budget-friendly smart security includes:
- Wyze Cam – starts under $30, 1080p video, motion alerts
- Ring Video Doorbell Wired – affordable way to monitor your front door
- Yale or August smart locks – sometimes available for $100 or less on sale
Tip: Look for refurbished models on Amazon Renewed to save even more.
Step 6: Save Energy With Smart Controls
One of the most practical benefits of a smart home is the ability to reduce energy consumption and lower utility bills. You don’t need high-end gadgets to start saving energy—affordable smart controls can make a noticeable difference. Smart plugs with energy monitoring features, available for under $20, allow you to track how much power your appliances use and identify energy hogs. By scheduling devices like space heaters or chargers to turn off automatically, you can prevent unnecessary energy waste.
Smart power strips are another effective tool. They let you control multiple devices simultaneously, making them perfect for entertainment centers or office setups. You can set timers to cut power to devices that are typically left on standby, which silently drain energy over time.
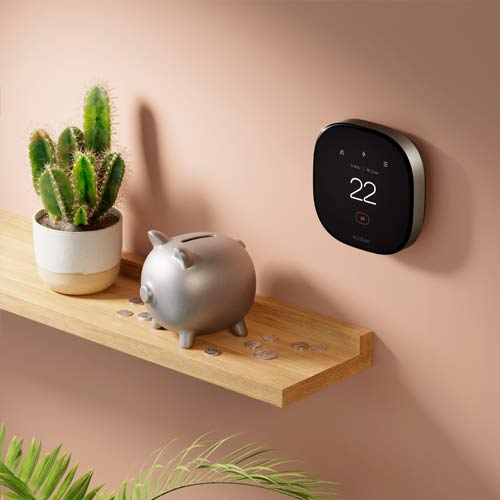
While smart thermostats are known for their energy-saving capabilities, entry-level models are becoming more budget-friendly. Some models start under $100 and offer basic scheduling and remote control features. Additionally, check with your local utility provider—many offer rebates or discounts on smart thermostats, reducing your upfront costs.
Even simple automations, like programming lights to switch off when you leave a room, can lead to long-term savings. Motion sensors under $20 can assist in automatically turning lights on and off based on occupancy, ensuring you’re not lighting empty spaces.
Pro Tip: Focus on automating devices that consume the most energy first. Appliances like heaters, air conditioners, and lighting systems offer the greatest savings potential. With small, strategic upgrades, you can build an energy-efficient smart home that benefits both your wallet and the environment.
Smart thermostats can get pricey, but entry-level models start under $100. Some utilities even offer rebates, bringing the cost down.
Other energy-saving tools include:
- Smart plugs with energy monitoring
- Smart power strips
- Scheduling heating/cooling
Small adjustments can add up to big savings.
Step 7: Expand Slowly
One of the biggest mistakes people make when building a smart home is trying to buy everything at once. It’s easy to get caught up in the excitement and overspend on gadgets you may not need right away. The key to a successful and budget-friendly smart home is to expand gradually, adding devices one step at a time based on your evolving needs.
Start by automating the essentials—like lighting or a few key appliances—before moving on to more advanced upgrades. For instance, once you’ve set up smart plugs and bulbs, give yourself time to adjust and learn how they enhance your daily routines. Then, as you become more comfortable with the technology, you can explore adding security cameras, thermostats, or smart locks.
Spreading your purchases over several months not only helps you manage expenses but also allows you to take advantage of seasonal sales and discounts. Shopping during events like Black Friday, Cyber Monday, or Prime Day can lead to significant savings. Additionally, monitoring deal websites and setting up price alerts ensures you’ll catch the best prices without impulse buying.
Expanding slowly also gives you time to troubleshoot and fine-tune your setup. You’ll be able to experiment with automations, understand how different devices interact, and ensure that everything remains user-friendly for your household.
Pro Tip: Create a smart home wishlist and prioritize items based on immediate impact and budget. As you gain experience, your list will evolve, allowing you to build a smart ecosystem that grows with you, rather than overwhelming you from the start.
The biggest mistake people make is trying to buy everything at once. Go step by step:
- Automate lights first
- Add smart plugs later
- Slowly integrate cameras or thermostats
- Finally, upgrade to smart locks or sensors
Spreading purchases over several months makes a smart home far more affordable.
Step 8: Shop Smart
If you’re on a budget, shop during:
- Black Friday / Cyber Monday
- Prime Day (if you’re on Amazon)
- End-of-season sales
- Back-to-school deals
Also consider:
- Buying used or refurbished devices
- Checking local marketplaces (Facebook Marketplace, OLX, etc.)
- Signing up for price drop alerts
Every dollar saved helps build your smart home faster.
Step 9: Maintain Privacy and Security
Cheap smart devices sometimes cut corners on security. Always:
- Change default passwords
- Enable two-factor authentication
- Keep firmware up to date
Privacy is priceless, even on a budget.
Budget Smart Home Starter Kit Checklist
- 2–3 smart plugs
- 2 smart bulbs
- 1 smart speaker
- 1 entry-level smart camera
- Motion sensor for a hallway
- Smart power strip
This kit can usually be built for under $200 and gives you a strong, expandable base.
Frequently Asked Questions
Q: Will I need a professional to install these devices?
A: Usually no. Most budget smart devices are designed for DIY installation with step-by-step guides.
Q: Is a smart home worth it if I rent?
A: Yes, most devices are plug-and-play, so you can take them with you when you move.
Q: Can I build a smart home without Wi-Fi?
A: Wi-Fi is essential for most devices, but some use Bluetooth. However, Wi-Fi is best for full control.
Q: Do cheap devices break easily?
A: Not necessarily, read reviews, buy from reputable brands, and look for warranties.
Conclusion
Building a smart home on a budget is totally achievable. Start small, choose a compatible ecosystem, and slowly expand. Focus on affordable devices like smart plugs, bulbs, and entry-level cameras to add convenience, safety, and energy savings without overspending. With a thoughtful plan and a bit of patience, your dream smart home is closer than you think.