Introduction
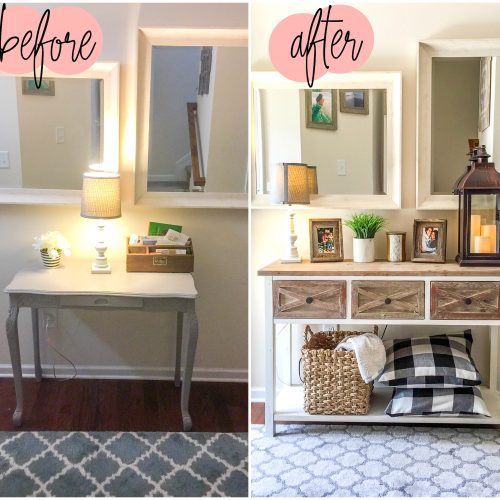
Are you tired of seeing the same old furniture collecting dust in your home? Many people overlook the hidden potential lying within these forgotten pieces, unaware that with a little creativity and effort, they can be transformed into stunning DIY decor. Instead of throwing away outdated furniture or spending a fortune on new items, you can upcycle them into beautiful, custom pieces that reflect your personal style and add unique charm to your living space.
Upcycling is not just a cost-effective alternative; it’s an eco-friendly way to reduce waste and promote sustainability. Giving old furniture a fresh makeover allows you to breathe new life into items that might otherwise end up in a landfill. Imagine turning an old wooden dresser into a chic sideboard or transforming a simple coffee table into a vibrant centerpiece that becomes a conversation starter.
In this article, we will guide you through various creative techniques and practical tips to help you revamp your old furniture. Whether you’re aiming for a modern look or a rustic, vintage vibe, these DIY ideas will inspire you to see every old piece in a new light. Get ready to unleash your inner artist and turn your home into a stylish haven filled with personalized decor.
Why Upcycle Old Furniture?
Upcycling is the art of transforming unwanted or outdated items into something new and valuable. It helps reduce waste, saves money, and allows you to create custom pieces that reflect your style. Plus, DIY projects give you the satisfaction of creating something beautiful with your own hands. Whether it’s a worn-out dresser, an old coffee table, or a vintage chair, every piece has the potential to become a stunning decor item.
One of the greatest benefits of upcycling is its positive environmental impact. By reusing and repurposing old furniture, you contribute to reducing the demand for new materials and lessen the burden on landfills. It’s a small but meaningful step towards a more sustainable and eco-friendly lifestyle. Additionally, upcycled furniture often carries a story or sentimental value, making it far more special than mass-produced items.
Another advantage is the ability to fully customize your decor. From selecting the colors and finishes to adding unique design elements, you have complete control over the final look. This ensures that each piece you create is a true reflection of your taste and creativity. Upcycling encourages you to think outside the box and turn ordinary items into extraordinary focal points within your home.
Start with a Vision
Before grabbing your paintbrush, take a moment to visualize what you want the piece to look like. Browse Pinterest, Instagram, or home decor blogs for inspiration. Think about how the piece will fit into your space—do you want it to stand out as a statement piece or blend seamlessly with your existing decor?
Having a clear vision will help guide your creative process and keep you focused on the desired outcome. Consider the overall theme of your room—whether it’s modern minimalist, rustic farmhouse, or boho chic—and imagine how the furniture can complement that style. Take measurements to ensure the piece fits perfectly in its intended spot, and sketch a rough design if needed.
Don’t be afraid to think outside the box. Sometimes the most striking transformations come from daring ideas, like mixing textures, combining materials, or even reconfiguring the furniture’s structure. Visualizing these creative possibilities early on will make the rest of the process smoother and more enjoyable.
Creating a mood board with fabric swatches, paint samples, and reference photos can also help you stay aligned with your vision. This step may seem simple, but it lays the foundation for a successful and satisfying upcycling project.
Clean and Prep Thoroughly
Preparation is key when transforming old furniture. Begin by cleaning the piece thoroughly to remove any dirt, grease, or old polish. Use a mild detergent mixed with warm water and a soft cloth to gently scrub the surface. For stubborn grime, a vinegar-water solution can be effective in breaking down residues without damaging the wood.
Once the furniture is clean, allow it to dry completely before moving on to sanding. Sanding is essential to create a smooth, even surface that paint or stain can adhere to properly. Start with a coarse-grit sandpaper to remove any old finish or rough spots, and gradually work your way to a finer grit for a polished base. Don’t forget to sand in the direction of the wood grain to avoid scratches.
If the furniture has visible scratches, dents, or gouges, apply wood filler to those areas. After the filler dries, sand it down to blend seamlessly with the surface. This step is crucial for achieving a professional-looking finish.
Proper preparation not only enhances the final appearance but also ensures durability and longevity of your upcycled piece. Investing time in cleaning and prepping will save you from issues like peeling paint or uneven finishes later on.
Creative Painting Techniques
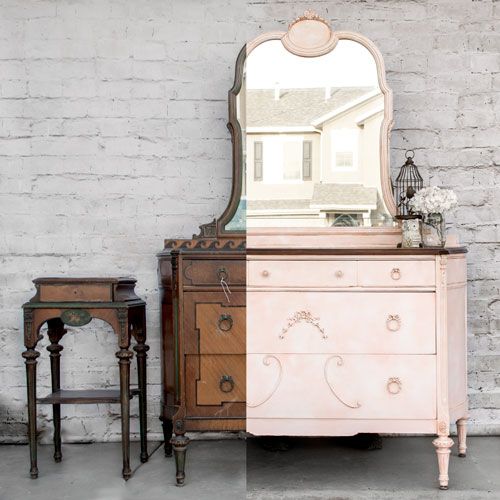
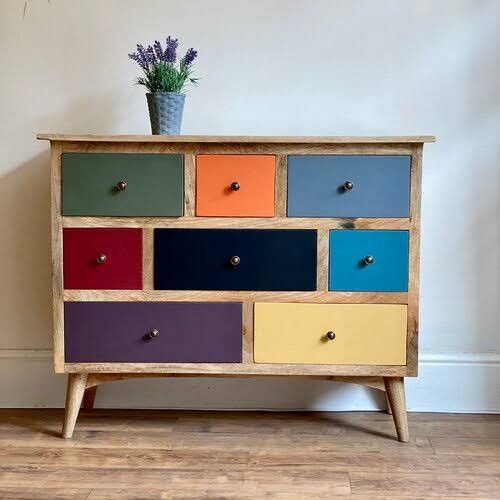
A fresh coat of paint can work wonders. You can opt for a classic matte finish, a bold pop of color, or even try trending techniques like color blocking and ombre effects. Chalk paint is a popular choice for its vintage, shabby-chic look and requires minimal prep. Don’t be afraid to experiment with stencils or hand-painted designs for a unique touch.
For those seeking a more textured appearance, layering different shades of paint and using dry-brush techniques can create depth and visual interest. Metallic paints or pearlescent finishes can also add a glamorous touch, perfect for accent pieces.
Before painting, always apply a primer suitable for the furniture’s material to ensure better adhesion and durability of the paint. This is especially important if you are working with laminated or glossy surfaces. You can even consider mixing different types of paints, like combining chalk paint with latex or acrylics, to achieve a custom texture and finish.
Using painter’s tape can help you create clean lines for geometric patterns or color blocks. Adding small artistic touches, like gold leaf accents or subtle distressing with sandpaper after painting, will elevate your piece further. Remember, painting furniture is an art—embrace experimentation and let your creativity shine.
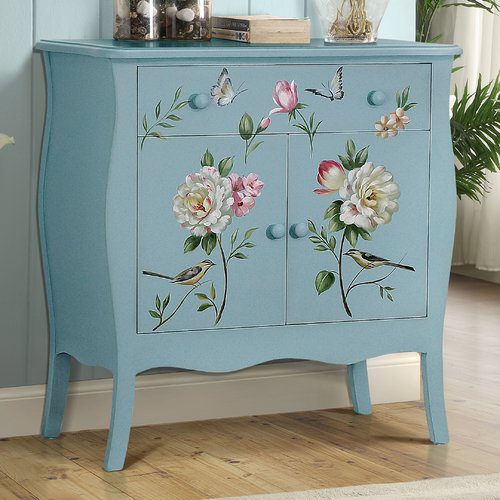
Decoupage and Wallpaper Magic
For a more artistic approach, try decoupage. This involves applying decorative paper or fabric onto the furniture surface using a special glue. You can use floral prints, vintage maps, or abstract patterns to give your furniture a distinctive look. Similarly, applying wallpaper to drawer fronts or tabletops can instantly elevate the piece.
Decoupage allows for endless customization possibilities. You can layer multiple patterns to create a collage effect or keep it simple with a single elegant design. Using high-quality decoupage glue or Mod Podge ensures a smooth application and long-lasting finish. After adhering the paper or fabric, it’s important to smooth out any air bubbles with a soft brush or squeegee to achieve a flawless look.
Wallpaper is another fantastic option for adding bold patterns and textures. Peel-and-stick wallpaper makes it easy to apply and remove, which is perfect if you enjoy changing your decor frequently. Consider using wallpaper with metallic accents or embossed textures for a luxurious feel.
To protect your work, always seal the decoupaged or wallpapered surface with a clear topcoat. This not only enhances durability but also adds a professional sheen. By incorporating these techniques, you can transform plain furniture into statement pieces that reflect your personal style.
Hardware Upgrade
Sometimes, all it takes to revamp a piece is replacing its hardware. Swapping out old knobs, handles, and hinges for modern or vintage-inspired alternatives can drastically change the furniture’s appearance. Opt for brass, ceramic, or crystal hardware for an elegant touch.
Sometimes, all it takes to revamp a piece is replacing its hardware. Swapping out old knobs, handles, and hinges for modern or vintage-inspired alternatives can drastically change the furniture’s appearance. Opt for brass, ceramic, or crystal hardware for an elegant touch.
Upgrading hardware is a quick and affordable way to breathe new life into dated furniture. The market offers a wide range of options, from sleek minimalist pulls to ornate antique-style knobs. Choose hardware that complements your desired aesthetic and adds character to the piece. For instance, matte black handles can give a contemporary feel, while bronze or copper fixtures add a warm, rustic vibe.
Mixing and matching different styles of hardware on a single piece can also create a charming eclectic look. Consider changing not only the visible hardware but also updating internal components like drawer slides or hinges for improved functionality.
Before installing new hardware, measure the existing holes to ensure compatibility or be prepared to fill and re-drill if necessary. Don’t overlook the impact of backplates and decorative keyholes, which can add extra flair.
A simple hardware swap can transform a plain dresser into a chic focal point or make a vintage cabinet look fresh and stylish, proving that even small changes can have a big impact.
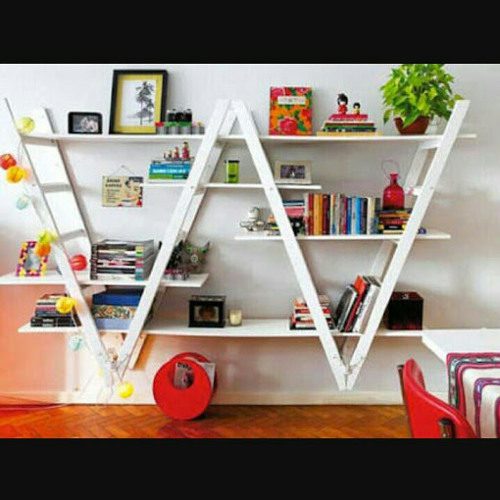
Creative Repurposing Ideas
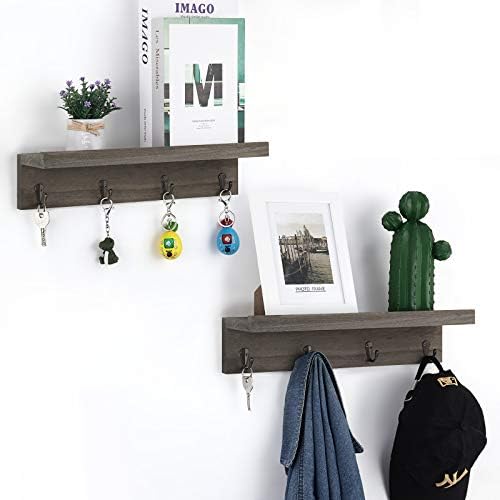
Think beyond the furniture’s original purpose. An old ladder can become a rustic bookshelf or towel rack. A vintage suitcase can be turned into a quirky side table. Wooden crates stacked together can make a charming shelving unit. Repurposing not only adds character to your home but also makes use of items that might otherwise be discarded.
Think beyond the furniture’s original purpose. An old ladder can become a rustic bookshelf or towel rack. A vintage suitcase can be turned into a quirky side table. Wooden crates stacked together can make a charming shelving unit. Repurposing not only adds character to your home but also makes use of items that might otherwise be discarded.
Creative repurposing opens up a world of possibilities. An unused door can be transformed into a stunning headboard or a farmhouse-style dining table. An outdated chest of drawers can find new life as a stylish kitchen island or a bathroom vanity. Even a broken chair can be reinvented into a unique wall shelf or plant stand.
When repurposing, think about functionality as well as aesthetics. Consider what spaces in your home could benefit from additional storage or decorative accents. Combining materials, such as adding glass tops to wooden bases, can create modern, mixed-media pieces that feel fresh and unique.
Repurposing is not only a creative outlet but also a sustainable practice that reduces waste and adds personalized charm to your home. With a little imagination, you can turn forgotten furniture into statement pieces that reflect your unique style and resourcefulness.
Distressing for a Vintage Look
If you love a weathered, antique vibe, distressing is a technique worth trying. After painting your furniture, use sandpaper to gently rub off paint along edges and corners, mimicking natural wear and tear. This adds a rustic, timeless appeal to your piece.
Seal and Protect Your Work
Once you’re satisfied with your transformation, don’t forget to seal the piece with a protective finish. Use clear wax for chalk-painted items or a polyurethane sealant for durability. This step ensures your hard work remains intact and your furniture stands up to everyday use.
Final Thoughts
Transforming old furniture into stunning DIY decor pieces is a fulfilling and creative process. It allows you to express your style, save money, and contribute to a sustainable lifestyle. Every old table, chair, or dresser holds the potential to become a conversation starter in your home. So, roll up your sleeves, unleash your creativity, and start giving your furniture a fabulous new life.
By following these simple yet effective techniques, you’ll not only beautify your home but also develop a deeper appreciation for the art of upcycling. Happy crafting!