Starting a garden is an exciting and fulfilling journey, especially for beginners. However, one of the most important and often overlooked steps is soil preparation. Healthy, well-prepared soil provides the foundation your plants need to grow strong, produce flowers or vegetables, and resist pests and diseases. This guide will walk you through everything you need to know to prepare soil for your beginner garden, even if you have no experience at all.
Why Soil Preparation is Important
Good soil preparation is the difference between a thriving garden and one that struggles. Plants get most of their nutrients, water, and oxygen from the soil. If the soil is too compacted, lacks organic matter, or drains poorly, your plants will have a tough time growing. On the other hand, well-prepared soil promotes healthy root growth, encourages beneficial microbial activity, and improves water retention and drainage.
Many beginners make the mistake of thinking they can plant straight into the ground without any prep. While this might work in very fertile areas, most home gardens need some improvement to support productive plant life. Taking time now means fewer problems later on, like stunted growth, yellowing leaves, or low yields.
Step 1: Choose the Right Location
Before you even start digging, make sure you select a suitable spot for your garden. Ideally, your garden should:
- Receive at least 6–8 hours of sunlight daily.
- Be near a water source.
- Have good drainage (avoid areas where water pools after rain).
Also, avoid placing your garden too close to large trees. Tree roots compete for nutrients and water and can shade out your plants. Choose a flat or gently sloping area that is easy to access and work with.
Once you find the perfect spot, mark it out using string, stakes, or even a garden hose.
Step 2: Clear the Area
Now that you’ve chosen a location, it’s time to clear it. Remove all weeds, grass, rocks, and debris. You can use a shovel, hoe, or even your hands if it’s a small area. Don’t skip this step — weeds can compete with your plants for nutrients and water.
For stubborn weeds or grass, consider using a tarp to cover the area for a few weeks. This method, known as “solarizing,” uses sunlight to kill unwanted plants naturally.
Alternatively, you can use layers of cardboard and compost to smother weeds in a process called sheet mulching. This method also improves the soil over time.
Step 3: Test Your Soil
Testing your soil helps you understand what you’re working with. You can buy a simple soil test kit from a garden center or send a sample to a local extension service. The test will tell you:
- Soil pH (how acidic or alkaline it is)
- Nutrient levels (nitrogen, phosphorus, potassium)
- Organic matter content
These results help you make smart decisions about amendments and fertilizers. For example, if your soil lacks nitrogen, you may choose to plant legumes that naturally fix nitrogen or add composted manure. Soil pH is especially important because certain nutrients become unavailable to plants in overly acidic or alkaline conditions.
Step 4: Improve Soil Structure
Most garden soils can benefit from added organic matter. This includes compost, aged manure, shredded leaves, or peat moss. Spread a 2- to 3-inch layer over your garden area and mix it into the top 6–12 inches of soil using a shovel or garden fork.
Organic matter improves:
- Drainage in heavy clay soils
- Water retention in sandy soils
- Nutrient content and microbial life
If you’re composting at home, that’s even better. Homemade compost is rich in microbes and nutrients and can be tailored to your soil’s needs. Remember, the goal is to create a crumbly, dark, and rich soil that smells earthy and supports plant life.
Step 5: Correct pH and Nutrient Deficiencies
If your soil test shows imbalances:
- To raise pH (make soil less acidic), add lime.
- To lower pH (make soil more acidic), add sulfur.
- For nutrient deficiencies, use the right type of fertilizer (organic or synthetic) based on your needs.
Organic fertilizers, like bone meal, blood meal, or fish emulsion, release nutrients slowly and improve soil health. Synthetic fertilizers provide quick boosts but don’t build long-term fertility.
Always follow product instructions and avoid over-fertilizing, which can harm plants.
Step 6: Till or Loosen the Soil
Loosening the soil helps roots penetrate easily and improves airflow and drainage. You can use:
- A shovel or spade for small areas
- A garden fork for deeper aeration
- A rototiller for larger spaces
Break up large clumps and remove any remaining rocks or roots. If you’re gardening organically or following no-dig methods, you can also simply add compost on top and let earthworms and microbes do the mixing.
Step 7: Level and Smooth the Surface
Once the soil is amended and loosened, use a rake to level it out. This helps water distribute evenly and makes planting easier. If you’re creating raised beds, shape the borders and fill them with your prepared soil.
You can also make simple furrows or planting mounds depending on what crops you’ll grow. For instance, root crops like carrots and potatoes benefit from deeper, looser rows.
Step 8: Water and Let the Soil Rest
After preparing the soil, water it thoroughly. This helps settle the amendments and activates microbial life. Let it rest for a few days before planting. This rest period allows the soil to stabilize and gives you a better idea of how well it drains.
During this rest time, check for any compacted spots or pooling water. If needed, add more compost or sand to improve texture and drainage.
Step 9: Add Mulch (Optional but Helpful)
Once your plants are in the ground, consider adding a layer of mulch such as straw, bark, or shredded leaves. Mulch helps:
- Retain soil moisture
- Suppress weeds
- Regulate soil temperature
- Improve soil as it breaks down
As mulch decomposes, it also adds more organic matter to the soil. Be sure not to pile mulch directly against plant stems, as this can cause rot.
Extra Tips for Container or Raised Bed Gardening
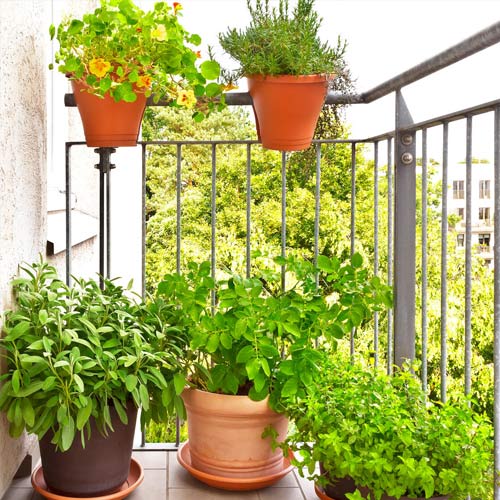
If your yard has poor soil or limited space, raised beds or containers are a great alternative. You can control the soil mix completely. A good blend for raised beds includes:
- 1 part garden soil
- 1 part compost
- 1 part coarse sand or coconut coir for drainage
This mixture offers excellent structure, fertility, and drainage — ideal for vegetables, herbs, and flowers alike.
Beginner Tips for Success
- Start small: Focus on a manageable space to avoid feeling overwhelmed.
- Use raised beds or containers if your soil is very poor or space is limited.
- Observe your garden regularly to spot issues early.
- Keep learning: Gardening is a journey, and every season teaches something new.
- Document your results: Take notes or photos to track what works and what doesn’t.
Conclusion
Preparing soil might seem like a lot of work, but it’s a one-time investment that sets your garden up for success. With just a bit of effort, even a beginner can create the perfect environment for healthy, thriving plants. Follow these simple steps, and you’ll soon enjoy the satisfaction of watching your garden grow strong from the ground up.
Remember, great gardens start with great soil. Be patient, stay curious, and trust the process. Over time, your soil will improve even more with each season as you add organic matter, mulch, and learn from experience. Happy gardening!


